
Starching your fabric before cutting
How to Starch and Prepare Your Fabric for Perfect Quilting!
The most common question I’ve been receiving lately is about how I prepare my fabrics for piecing. So today, we're going to talk about what I believe is one of the most important steps in quilting: preparing your fabric. If you want to create a beautiful and long-lasting quilt, you need to start with high-quality, well-prepared fabric. So are you ready to learn the secrets to getting perfectly crisp and clean fabric for your next quilting project? We'll be talking about the benefits of starching your fabric and I’ll show you how I like to starch and prepare your fabric for perfect quilting every time!
I want to start off by telling you that I will be comparing some different products and giving you different approaches, however, I will be sharing my experiences and what works for me. So take that with a grain of salt, this method may not be for everyone, but it sure works for me. I hope you find the information helpful too. But make sure and stay until the end to find out exactly how I prepare my fabrics.
I also want to mention that the processes I am going to talk about today are all processes before cutting your fabric.
Pre-Washing Fabrics
First debate – to pre-wash or not to pre-wash! It is quite the debate between some quilters. Pre-washing fabric before quilting involves washing the fabric before it's used in a quilt. Here are some reasons why you may or may not want to pre-wash your fabric:
-Reasons to pre-wash your fabric:
Shrinkage: Pre-washing your fabric can prevent shrinkage after your quilt is complete. This is especially important if you're using fabrics that may shrink, such as cotton or linen.
Color Bleeding: Pre-washing your fabric can also prevent color bleeding. If you're using fabrics with vibrant or bold colors, it's best to pre-wash to prevent or minimize the colors from bleeding into each other during the quilting process.
Chemical Residue: Some fabrics may have chemical residue from the manufacturing process. Pre-washing can remove any residue and make the fabric softer and easier to work with.
-Reasons not to pre-wash your fabric:
Texture and Feel: Pre-washing can change the texture and feel of the fabric. If you want your quilt to have a crisp, new feel, you may not want to pre-wash.
Fraying: Pre-washing can also cause fraying on the edges of the fabric, which can be a hassle to deal with when cutting and sewing. Speaking of, NEVER pre-wash pre cuts like jelly rolls or charms squares. I know from personal experience, this can create a disaster. Your pieces will come out in quite the mess!
Last reason is just a fact of modern life – sometimes pre-washing just takes up time and effort that you may not have. Nothing wrong with this and it’s quite often a reason that I skip this step.
Ultimately, whether or not you pre-wash your fabric is a personal preference. Consider the benefits and drawbacks and decide what works best for your project. Another big consideration for me on whether or not to pre-wash my fabrics is the manufacturer that I’m working with. The more quality fabrics tend to bleed less, so there’s not as much need to pre-wash. Also, consider the colors you are working with. If you are using reds or purples, you may want to pre-wash because these have a greater chance of bleeding. If you're unsure, test a small swatch of fabric to see how it reacts to washing before making a decision.
Next debate…Starch…
Why Starch Your Fabric?
First things first, let's talk about why you should consider starching your fabric. Starching your fabric adds body and stiffness, making it easier to handle and cut. Starching your fabric can make it easier to cut and sew, reduce fraying and stretching, and help your finished project hold its shape. You’ll also notice that it helps throughout the entire piecing process. It can also help if you are going to be cutting and sewing on the bias of your fabric. I’ve linked another video that I have for you about how starch can help when working with fabric cut and sewn on the bias.
Now, starching your fabric is purely a personal preference. It’s not a requirement and not something that you should feel that you have to do. But I am a firm believer in starch and that’s because I’ve seen the difference in my piecing when I starch or when I don’t. So try it and see if you like it.
Types of Starch:
Now that we understand the reasons behind starching our fabrics, let’s talk about the most common types of starch and fabric sprays used in quilting.
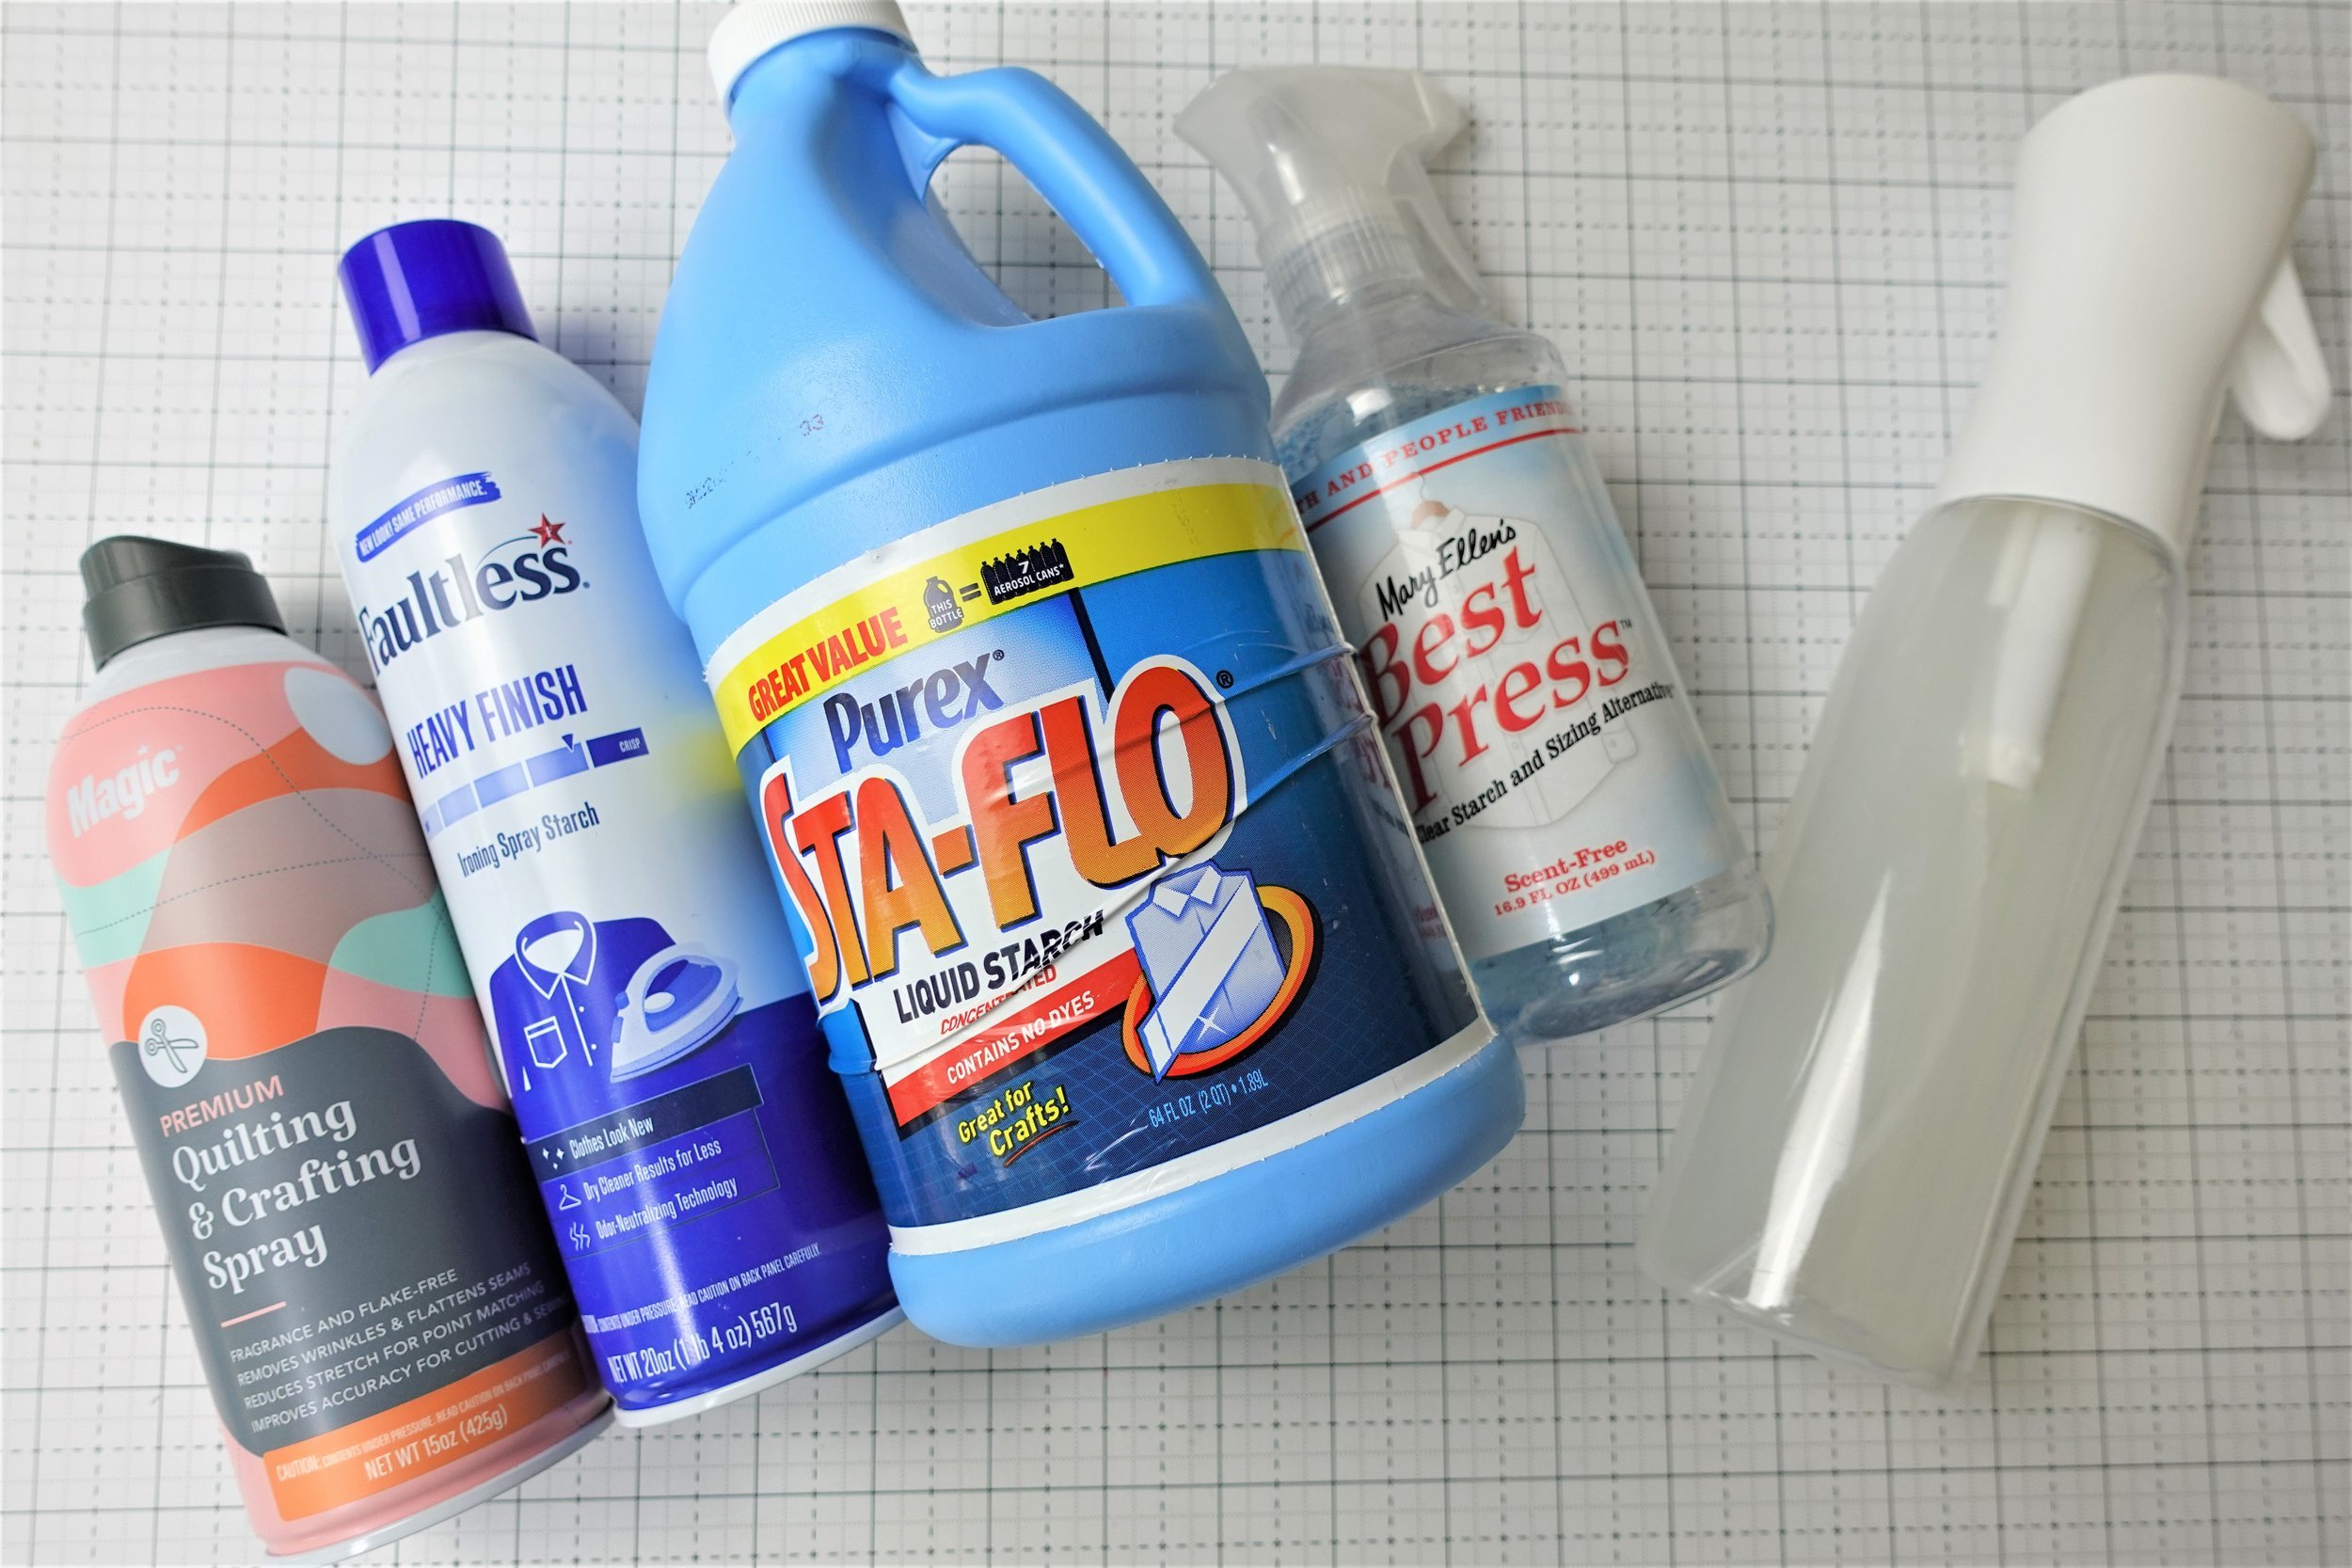
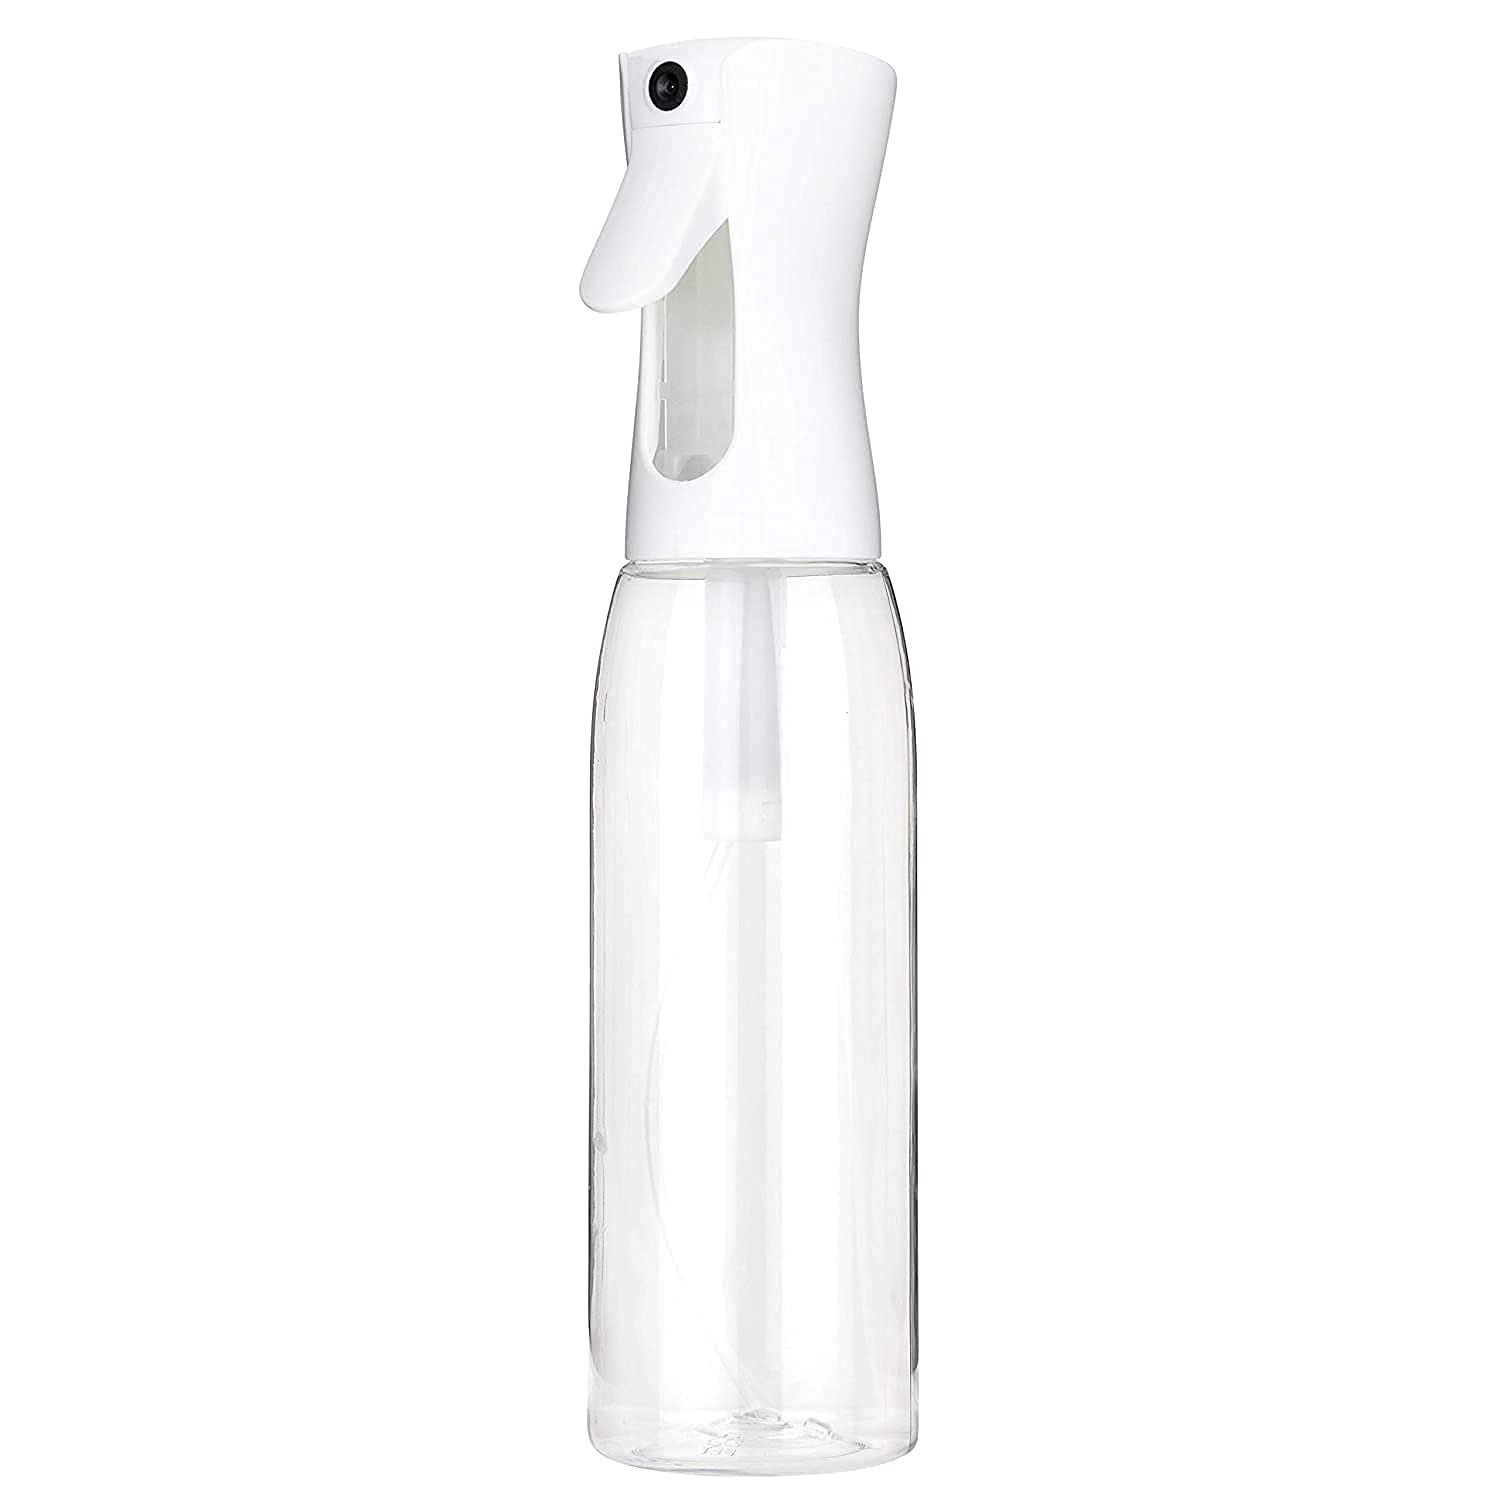
-Liquid Starch: Liquid starch is a traditional starch that is diluted with water and applied to fabric using a spray bottle or soak. I also have a larger misting bottle like THIS for when I am working with a lot of fabric at one time. Liquid starch dries to a stiff finish and can be used for a variety of fabrics. I like to use Sta-Flo brand liquid starch. I’ll show you a bit later in the video how I like to use this product.
-Spray Starch: Spray starch is a convenient alternative to liquid starch, as it can be sprayed directly onto fabric from a bottle. It comes in different strengths, from light to heavy, and can be used for different types of fabric. You’ve probably seen these like Niagara or Faultless brand. This is typically what you would use when starching clothing. But they can really give your fabrics a nice stiff construction. If I’m in a pinch, I love using these on my fabrics.
-Flatter Spray: Flatter spray is a fabric spray that adds a light, subtle fragrance to fabric while also adding a slight amount of stiffness. It's perfect for giving your quilts a fresh scent. This is a product that I typically use after my fabric has been cut and I’ve begun to piece my blocks. It’s a bit more expensive, so it’s not something you want to use on all of your fabric ahead of time.
-Best Press: Best Press is a fabric spray that adds body and stiffness to fabric without leaving any residue or flaking. It's great for delicate fabrics and can also be used as a spray starch alternative. It is a common product in the quilting community and is a great option before cutting your fabrics. One of the most common issues that I’ve read about this and frankly, it’s what keeps me from using it, is the scent. They have various scent options and as you can see, I have the scent-free option, however, there is still a scent to it and it can be overwhelming to me sometimes, so I typically don’t use this although I do love the stiffness that it does give to your fabric.
When choosing a starch or fabric spray, be sure to read the label to ensure that it's suitable for your fabric type and intended use. And always test on a small, inconspicuous area before using on your entire project, especially with certain colors and it can cause problems with some colors. There are some key issues I’ve noticed that make a difference on whether or not I like a particular product.
Residue: Best Press is known for its ability to add body and stiffness to fabric without leaving any residue or flaking. Starch, on the other hand, can leave a residue or flake if it's not applied correctly. I’ve noticed that Magic Spray does not leave a residue or flaking either.
Strength: Best Press is a lighter weight spray that adds a subtle amount of stiffness to fabric, whereas starch comes in different strengths, from light to heavy. Starch can be a good option if you need a heavier weight for your fabric.
Fragrance: Best Press comes in a variety of scents and can add a light, subtle fragrance to your fabric. I personally have an issue with even their unscented version, so if this is a concern for you then you may want to consider this before using it. Starch typically doesn't have any added fragrance.
How to Starch Your Fabric
So, how do you go about starching your fabric? It's actually quite simple! If you are using a spray, then you’ll just start spraying your fabric and ironing it. I usually just start with everything I need for my project and go to town!
Now I told you that I was going to show you my exact process, so here we go. I love using Sta-Flo liquid starch. I use 50% liquid starch and 50% distilled water. I find that adding the water cuts the stiffness a bit. Using it full strength is sometimes too stiff for me. I put the mixture in a fine misting bottle like this. I bought these off Amazon and I love them because they are large capacity and the fine mist is perfect for covering my fabric evenly. Now depending on the project, sometimes I will actually soak my fabrics in the mixture in a nice plastic tub like this.
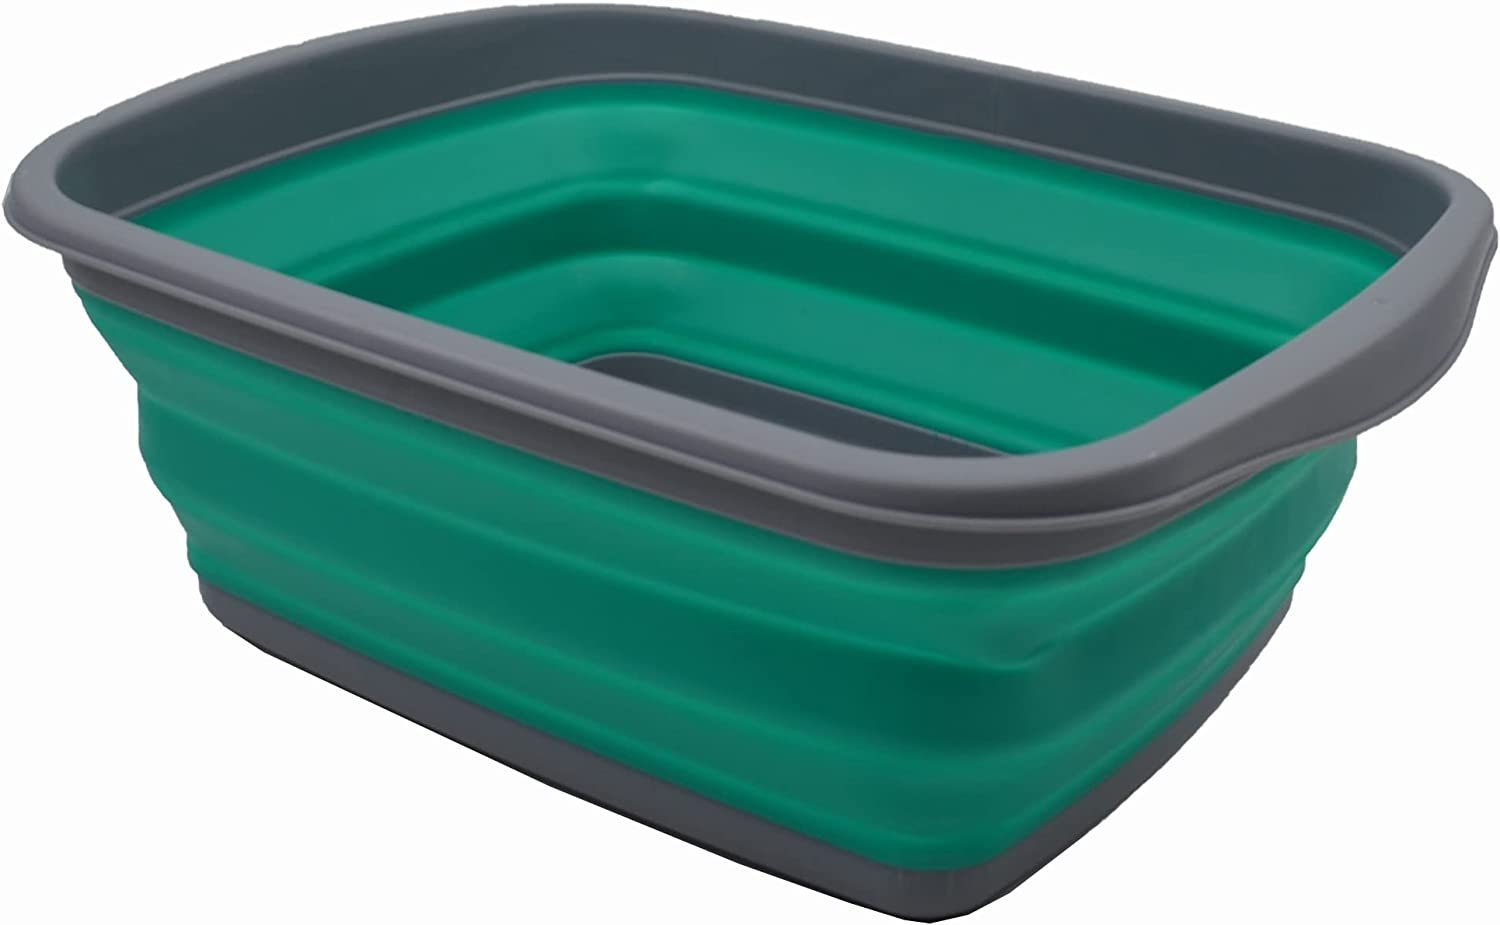
I again use 50% water/starch mixture. Then I dip my fabric in the tub and lay them flat to dry on a clothes drying rack that I keep in my extra bathroom. This process can take a bit longer and you’ll need to plan ahead of you want to use this process because your fabrics will need several hours to dry. I do not suggest that you try ironing the fabrics directly after dipping them. Allow them to air dry and the starch will saturate your fabrics. Sometimes I find that I have wrinkles once the fabric is dry so I use another misting bottle, this one is filled with distilled water and I spray the deep wrinkles and my fabric comes out perfect, with lots of structure for my project.
If you are using any other product, like the spray starch or Best Press, to get started, depending of how much fabric I will be preparing, I like to cover my ironing board with an old towel which protects it from getting too wet while you are working with your fabrics. It also prevents having to wash your ironing board cover when the starch builds up too much. Then just lay your fabric out flat and spray it lightly with starch. Be sure to spray both sides of the fabric, making sure it's evenly coated. Again, if your fabric is really wet, you may want to let it air dry. It’s less ironing effort too!
After you've sprayed your fabric with starch, it's time to iron it. This sets the starch and gives your fabric that nice, crisp feel. Be sure to use a hot iron and press firmly to get out any wrinkles or creases.
And that’s basically it! I try to do all of my starching and ironing at the same time for a project and then I can move to the next step from there. There’s nothing worse than having to stop cutting or piecing your fabric because you need to starch and iron it.
I know I’ve probably lost some of you with this process because it seems so time consuming but I would really encourage you to consider this part of the quilt making process, just like measuring, cutting, and sewing. You’ll notice that your cuts are more accurate and your piecing is really improved with the nice pressed fabric. Do me a favor, drop me a comment and let me know what you think. Were you already starching your fabrics, is it a process that you feel is important like I do? If you haven’t done this before, are you going to try it out?
And if you’re interested, I’ve linked all the products below if you want to check those out.
Now I have a few important tips and reminders for you!
-Make sure that you starch both sides of your fabric. You want to make sure that you are getting a consistent level of stiffness within all of your fabric.
-If you have quite a bit of yardage that you need to prepare, I suggest subcutting it to make it more manageable. I will usually look at my pattern and see how I can Subcut the fabric without wasting any. Trust me, working with a 20” piece of fabric is much easier than a 40” piece!
-Avoid starching fabric precuts like jelly rolls, charm packs or layer cakes, etc. and also smaller pieces of fabric that have already been cut. The starch will cause the fabric to shrink and it can also cause distortion in your pieces. After all, you’re using pre-cuts because they’ve been precut for you, so you really don’t want to mess that up. If you do decide to starch precuts or smaller pieces of fabric, I would encourage you to avoid over saturating the fabric and take care when ironing. Minimize or avoid ironing back and forth, which causes distortion and measure your pieces before using them to check their size again before using them.
-Speaking of distorting your fabrics, I would encourage you not to use starch after you’ve cut your fabric and begun to piece with it. Again, starch can cause shrinkage and if you spray it on a block that you’ve pieced, it can cause uneven shrinkage and affect your seams or block size. If you have stubborn wrinkles that you need to get out, I prefer to use steam, a misting bottle filled with distilled water like I showed you before or a product like flatter, which is a starch-free alternative.
-I also don’t recommend you starching and then storing your fabrics. Try to only starch the fabric you need for your project. I know this can’t always be avoided, but try not to starch fabric that you will put back into your stash. Storing starched fabric over a period of time can cause them to become stiff and brittle, which can make them more difficult to work with. It can also attract insects depending on where they are kept.
So that wraps up our chat about starch and fabric preparation. I hope these tips were helpful and if you enjoyed this tutorial!
Supplies and products used/mentioned in this tutorial & video:
Soak Smoothing Spray - Flatter
Fine Misting Spray Bottle 17 oz
Affiliate Disclosure Policy: This website uses affiliate links, and I may earn a small commission if you purchase through these links. Please note that I’ve linked to these products purely because I recommend them and they are from companies I trust. There is no additional cost to you.